Finally. The last post of this 3 part sub-series on upgrading the CPU on the G4 Quicksilver (QS). This post mostly consists of a numbers comparison between the old and new processors to see how much of a performance gain we obtained via various benchmarking tools and performance tests. I decided this route as I think its pretty obvious that there were some significant improvements all around and I was curious to read up more on some of the benchmarks I ran within Debian.
However, before we start to play the numbers game, let us take a look at and compare the specifications of each CPU, so we have an idea of the difference in terms of hardware. I wanted to display this information in a table-like format using screenshots of the System Information section of the Geekbench results as I believe displaying it in this way it much more helpful for the reader to process and understand. I will go over some of the different specifications in a little more detail below.
Not only is the number of processors doubled, but the the clock rate/frequency has increased by 333.25% (((1332 x 2) / 800) * 100). Not only that, but the upgraded processor also includes 2 MB of L3 cache per CPU whereas the stock lacked a level 3 cache at all. Having a decent sized level 3 cache should lead to less
cache-misses, which leads to fewer fetches of required data from system memory. Of course this can be variable depending on the software/workload the system is under, but either way, there should be some big improvements in that department as well. One other aspect not covered by the above screenshot is for Altivec support, of which, both support, but at the moment we do not really care.
Onto the testing methodologies and tools. For actual software benchmarking tools I have decided to again use Geekbench as well as the CPU benchmarking tools within the hardinfo software (a.k.a System Information tool) available in the Debian repos. I ran Geekbench v2.2.7 (download
here), the last to support OS X PowerPC, both before the CPU upgrade and after. Here are screenshots of summary results for each:
Again, the results are easy to decipher with results showing double the performance in both the integer and floating point section and even a slight increase in memory (?). You will notice the stream summary has actually dipped 20 points. Why is that? I read through
Geekbench 2's documentation on the different stream tests, but am still having a tough time wrapping my head around the drop. Stream tests try to test performance of work done between just the processor and memory (no file I/O). My theory is that somehow the level 3 cache affects this in some manner due to it caching data instead of needing to pass it back to system memory. If anybody else could clarify I would appreciate it thoroughly.
Great, so what about on the Debian/Linux side of the coin? Let me first give an overview of handful of tests I could and did perform on each CPU. I will briefly cover what each is or does. I found a bit of concrete documentation of most of these in the package's
code on GitHub, but some additional research and knowledge retrieval from my Computer Science degree helped to fill in most of the remaining gaps. So here are the benchmarks I ran:
CPU Blowfish - Lower is better. My conclusion is that this is running a stress test on the CPU using the
blowfish encryption cipher. Interestingly, this particular cipher has no known cryptanalysis of it to date.
CPU CryptoHash - Lower is better. Another CPU stress test utilizing a cryptographic hashing function to measure performance.
CPU Fibonacci - Lower is better. A test of the
Fibonacci function using recursive programming and parallel processing.
CPU N-Queens - Lower is better. A
mathemical puzzle/computer science problem of trying to place N number of Queens on an NxN chess board in such a manner that no two queens attack each other.
FPU FFT - Lower is better. According to the documentation in the code, "a number crunching benchmark using LUP-decomposition to solve a large linear equation."
FPU Raytracing - Lower is better. According to almighty and faithful
Wikipedia, "... a technique for generating an image by tracking the path of light through pixels in an image plane and simulating the effects of its encounters with virtual objects. As you may have noted it tests out the CPU's floating point performance." I find that interesting that it deals with graphics although I know many operations for graphics are still executed on the CPU, especially on these older systems with older graphics cards.
Here are the results:
With double the performance results we saw earlier with Geekbench, I was not surprised to see a similar outcome here.
Now onto every day tasks. For this I decided to execute the following tasks and timed each of their executions until completion with all of them only being completed while booting up or booted within Debian. For the 3 tasks, I am going to 1) Open Ice Weasel and browse to DuckDuckGo (an excellent replacement for Google's search engine) and have the page start displaying input 2) Boot the system to Debian and type the first character at the login screen and 3) Run apt-get update. A nice array of different tasks that most users will encounter on an almost if not daily basis. Here are the results across the 2 different CPUs.
Not a surprise here either. Basically, double the performance for the first 2 tasks. The Debian boot up task is more I/O bound so nothing to look at there for performance gains, but I will refer back to these numbers when I start upgrading the hard drives.
I am a bit glad the CPU portion is over, but I am a bit sad as well as we all know CPU upgrades can offer the biggest performance benefits as can clearly be seen from my results above. However, I still have the move to SSD IDE drives, the move to SATA HDs, and then SATA SSDS, so there is still some performance gains to be had there. Plus, I have not covered graphics upgrades as well, which will mostly depend on whether it will support 2D and 3D acceleration, which as most of know can be quite a headache on our Big Endian machines, but the march of progress continues on that front as well. If you have not heard yet, as of Mesa 11.0.3, 3D acceleration is working with the nouveau driver although not quite at the performance it could be. I have tested this on my PowerMac G5 and plan to test it out on my QS by upgrading to Stretch (which is already using a later version of Mesa for that matter) after first making a backup clone onto an SSD before making the jump to the SSD.
Before I sign off here, I want to note that I have recently installed 3 royal blue RAM heat sinks on each of the 3 sticks of RAM for even perhaps a small minute drop in temperature and small minute increase in performance due to the lower temperatures, but I have no concrete evidence to support that wild claim and will not discuss it any further than that. Here are a few photos of the QS's internals so far with the few upgrades I completed.
I also picked up an ATI FirePro XL3 graphics card with 256 MB of VRAM. Hailed as the second fastest GPU upgrade for a G4 PowerMac right behind the NVIDIA 7800 GeForce GS, which I also happen to own. More on that when I cover the graphics portion of this series.
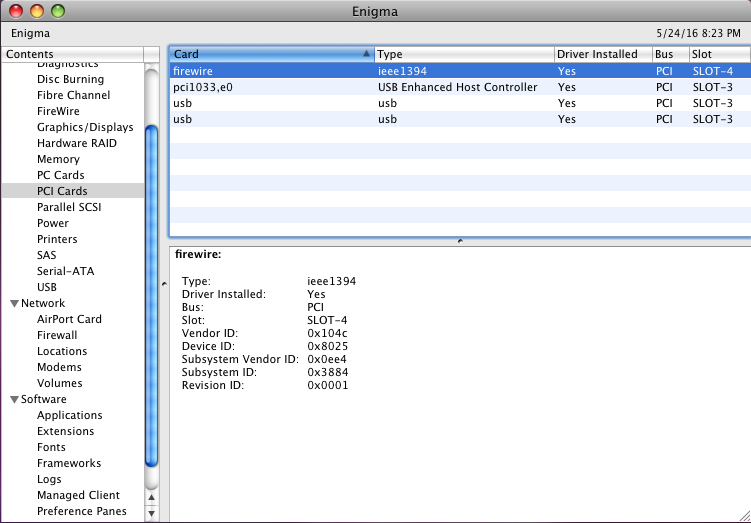
Next up is a 6-port USB PCI card upgrade.